Spiced Apple Cranberry Cider

Hot Spiced Cranberry Cider

Ingredients

  • 2 quarts apple cider *
  • 6 cups cranberry juice
  • 1/4 cup packed brown sugar
  • 4 cinnamon sticks
  • 1 1/2 teaspoons whole cloves
  • 1 lemon, thinly sliced
Directions
  1. In a large pot, combine apple cider, cranberry juice, brown sugar, cinnamon sticks, cloves and lemon slices. Bring to a boil, reduce heat, and simmer for 15 to 20 minutes. With a slotted spoon, remove cinnamon, cloves, and lemon slices. Serve hot.

*http://allrecipes.com/Recipe/hot-spiced-cranberry-cider/detail.aspx

Apple Cider

Ingredients

  • 8 -10 apples (5 Gala, 5 Granny Smith)
  • 1/2-1 cup (1/2 white, 1/2 brown)
  • 4 tablespoons cinnamon (or 4 cinnamon sticks)
  • 4 tablespoons allspice

Directions

  1. Quarter your apples (no need to remove peel or seeds).
  2. In a large stock pot add your apples and fill with water–just enough to cover the apples.
  3. Add your sugar.
  4. Wrap your cinnamon and allspice in a doubled up cheese cloth and tie, and add this to the apples and water.
  5. Boil on high for one hour (uncovered) checking on it frequently.
  6. Turn down heat and let simmer for two hours (covered).
  7. Take off the heat after two hours of simmering and let cool.
  8. Remove spices and mash up the apples to a pulp like consistency (a potato masher works well for this).
  9. Once cool pour into a strainer over a large bowl. When most of the juice has drained away, put the remainder of the pulp into a doubled up cheese cloth and squeeze over the bowl until no more juice comes out.
  10. You can store in an air tight container in your refrigerator for up to a week or you can freeze it for later use if you like.
  11. Reheat in the microwave or on the stove and enjoy either plain or you can add caramel syrup or caramels, whipped topping with cinnamon.
  12. also you could make this a diabetic recipe by omitting the sugar and adding diabetic sweeteners to taste in place of the sugar or none at all.
*http://www.food.com/recipe/moms-homemade-apple-cider-non-alchoholic-253224

Jamie Eason Turkey Meatloaf Muffins

If I had to think about one person that I would love to look like, it would be Jamie Eason. She maintains her femininity and yet looks very strong. I admire any woman that can take care of herself and maintain a successful business/career. But especially her. You can tell she’s the sweetest thing, and she’s a breast cancer survivor and still going strong. Much to admire!

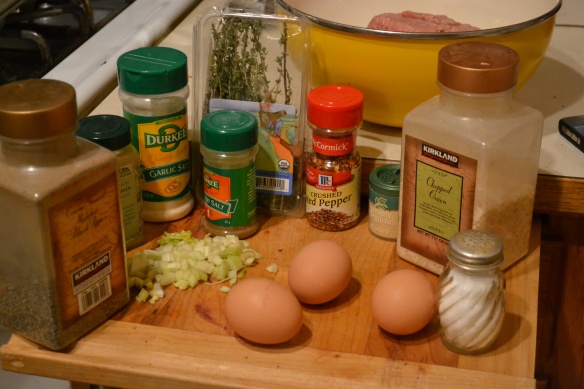
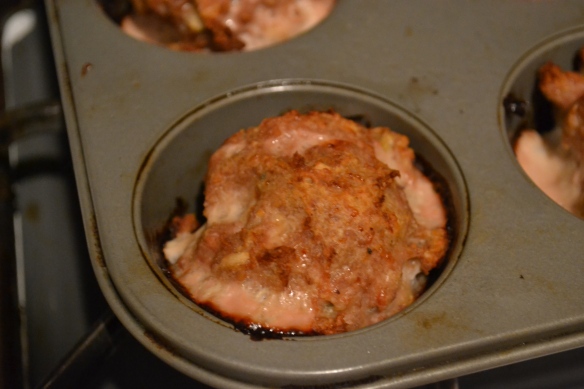
I am going through her Live Fit 12 week program and found some of her tips and recipes interesting. This one is essentially turkey meatballs large sized….turkey muffins is really kind of a scary term, but that is what we will call them. The serving size of these guys for women is 2 and for men 4. You can really  make them as big or small as you like but you will need to portion and adjust your cooking time accordingly.

These are very tasty. Just enough seasoning, moist enough where you do not need a topping. Smokey from the cumin, spicy from the flakes, and garlicky with the garlic powder. Feel free to add in anything you’d like. I have thrown in some red bell peppers and roasted or sun-dried tomatoes. Yum! You can also use something else besides quick cooking oats which I never have on hand. Today, I used plain bread crumbs, but these really taste best if you have garlic croutons and crush them up to replace the quick cooking oats. Add mores fat but much more tasty. Besides, these little guys are already figure friendly. You can freeze these too, and they will stay in your freezer for a few weeks so you always have something tasty and low fat ready to go. NO MORE EXCUSES!

JAMIE EASON TURKEY MEATLOAF MUFFINS
*slightly adapted

Ingredients:

* 2 lbs ground turkey (or chicken)
* 3 egg whites
* 1 cup quick cooking oats (I like crushed up garlic croutons)
* 1/2 tsp ground cumin +
* 1/2 tsp dried thyme
* 2 tsp dry yellow mustard
* 2 tsp black pepper
* 2 tsp chili pepper flakes
* 1 tsp salt
* 2 tbsp garlic powder (2 cloves minced)
* 1 small onion (finely chopped)
* 2 celery stalks (finely chopped)
*celery salt, garlic salt, green onions to taste

Directions:
1. Preheat oven to 375 degrees.
2. Spray muffin pan with canola or olive oil.
3. Mix all your ingredients together in one large bowl.
4. Roll the mixture into balls and place in muffin pan. Muffins should be about the size of a racquetball.
5. Bake for 40 minutes.

*Tip – bake one muffin or fry a piece of the mixture on the stove top to test if the seasonings are to your liking.

Makes 12 muffins.

Serving Size:
Women: 2 muffins
Men: 4 muffins

**I will be adding a cauliflower recipe soon that would make the perfect side dish soon!

Picabu Neighborhood Bistro

After seeing this restaurant featured on Diners, Drive-Ins, and Dives, I knew I had to come to Picabu Neighborhood Bistro. 

Walking in, it felt like a nice friendly non-intimidating atmosphere. I noticed the signed print of Guy Fieri which I noticed RIGHT AWAY and had to take a picture.  We, as in my friend Jesse, sat at the bar so we could get a full on view of what was going down in the kitchen. There were two cooks working furiously to get the orders out in a rather small environment. However, the restaurant itself is pretty small maybe with 15 tables and a short bar, so the kitchen size seemed adequate. The server was nice & friendly but seemed a little too much in our business as seemed to be the case with the majority of the employees there. There was a bus boy (?) that just stood there right by Jesse almost the entire time we were eating and watched the tv which was right above us.


Ok so on to the food. They say that “The menu features an eclectic mix of Thai-American-Mexican-Cajun inspired favorites and a concise, quality selection of beer & wine.” We started with the Mexican-seasoned fried calamari rings and tentacles, served with tangy cilantro-lime sauce. Not bad, not great. To me, there was nothing Mexican about it. Not really spicy, just your average Calamari fried in a yummy batter. I prefer a regular creamy aoli with my Calamari, but I was open to trying something different. I have to say, there was a little too much tang in that sauce (for me at least). The Calamari was tender and not rubbery. Key to good Calamari. NEXT.

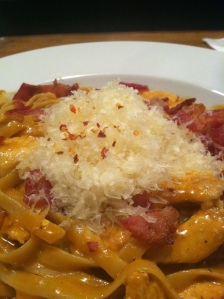
I had a hard time deciding on an entree. Nothing stood out to me as being that original or something mouth watering that I knew I had to try. I ended up ordering the Fire Pasta ($12.50) which featured sliced chicken breast sauteed with fettuccine in an “oddly-addictive spicy garlic cream sauce” topped with fresh Parmesan and smoky bacon. I saw the cook take a large ladle and slap this paste looking substance into the pan and flames went everywhere. My dish ended up to me luke warm. I could have said something, but I never like to send anything back. YOU JUST NEVER KNOW, ya know? The sauce was definitely creamy and thick. Not too spicy but just enough heat that creeps in after a few seconds of taking a bite. There was supposed to be garlic in there, but I didn’t taste any. They really should have called it Buffalo Wing Pasta because that’s exactly what it tasted like. The chicken was the saving grace, moist and succulent. The fresh Parm micro planed on top was like a beautiful soft cloud slowly melting into the noodles. If they would have given me a big pile of that with some crackers, ah heaven. The bacon was a good addition, not too crisp, not too soft. It added that nice smokeiness and crunch it needed to balance out the softness of the noodles. It was ok, not something that I would consider addictive. (side note – I reheated this the next day, and talk about icky oil. There a huge orange puddle sitting at the bottom of my bowl.) My friend thought the dish tasted like ketchup and mustard mixed together…he’s a bit harsher than me when it comes to food…

My friend got the Curry Bowl that featured mixed vegetables and your choice of chicken or Small Planet tofu in a spicy red curry-peanut sauce over jasmine rice, garnished with cilantro. ($11.50). He stated it was bland. There should have been more vegetables with it. Maybe sear the tofu, sear the veggies for caramelization. But there was none of that. Just bare tofu placed in a thick bland curry with some steamed veggies. Ouch.

For a place that was recommended on the FOOD Network, I was very disappointed. Maybe it was what we ordered, and maybe the help was bored that night…Who knows, but I do know that it is a popular place here in Spokane, and people do love it. The employees were nice & friendly, even though a little nosy. The prices were in line for the portions. I just don’t think the flavors were there. I always give a place a second chance, so I will be back to try it again. And of course will report back on my findings. As always…

Happy Eating,

♥ G

Wicked Wednesday: Eyeball Cupcakes

Ok, ok; I’ll admit it. My new favorite thing to have with a nice cup of joe are…cupcakes! What else would a sane person trying to lose weight eat first thing in the morning? There is just something about eating something sweet with coffee, really jump starts your day (temporary sugar rush talking, endorphins kicking in). Or in my vampiress case, night (I work graveyard – everything is backwards!).

With Halloween right around the corner, I knew I had to do something fun and spooky. Well, I suppose these didn’t really come out as spooky as I would have liked. They’re actually pretty darn cute. If you can’t guess by my amazing pictorials (no pun intended), they are supposed to look like eye balls. So what if the frosting turned out yellow…and I ran out of red food coloring…it’s all about imagination right?

These cupcakes are moist, chocolaty, and buttery. There’s no better way to describe them. Oh and definitely wicked too!


Enjoy ♥ G

INGREDIENTS

Directions:

  1. Boil water in a kettle then measure out 1-1/4 cup.
  2. Combine chopped chocolate and cocoa powder in a medium sized bowl, add boiling water, whisk until smooth, set aside.
  3. Sift flours, baking soda, and salt into a bowl. Add the ground pepper, set aside.
  4. In a standing mixer, beat butter until creamy.
  5. Add the brown sugar and beat until fluffy, about 3 minutes.
  6. At medium speed, add eggs one at a time, beat well between each.
  7. Add sour cream and vanilla and beat until combined.
  8. Add about a third of the flour mixture, beat briefly until combined.
  9. Add about half of the chocolate mixture, beat briefly until combined.
  10. Repeat, adding flour, chocolate, then flour. Beat until just combined. Scrape down bowl if needed.
  11. Fill cupcake papers about 3/4s full. Bake at 350 degree oven for 22-25 minutes or until cake tester comes out clean.
  12. After cakes have cooled and been frosted, place one gummy in the center of the cake. Then slice a very small portion of another gummy and place into the center. You can also use a jelly bean!
FROSTING

Directions:

  1. In a bowl combine butter, sugar and salt. Beat till blended.
  2. Add the milk, vanilla, and spices and beat for an additional 3 to 5 minutes or until smooth and creamy.
  3. Frost cupcakes keeping a small portion and tint with food coloring of your choice. Spread on with a toothpick or pipe with a piping bag to make veins.

Garlic Shrimp & Swiss Chard With Polenta

You may not like Polenta. I totally get it. I’m not much into the texture of cornmeal myself, but let me tell you, when paired with the luscious smoothness and slight crunch of the other ingredients, you will love it.

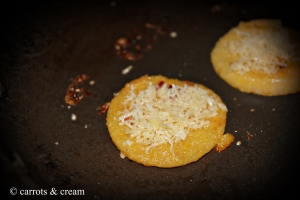
The original recipe called for Instant Polenta. Instead, I found organic solid Polenta with garlic and roasted tomatoes already in it. I cut these into circles baking the grated parm on top so that it melted. This was a great way to avoid the extra calories by avoiding the milk as well as all the butter in the recipe and you use WAY less parm while still getting a little bit of that cheesy goodness squeezed in. Yum-ay.

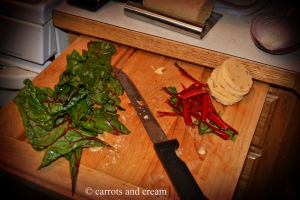
Swiss chard comes in a two different varieties that I have seen. One with red stems as you see here and rainbow which is an assortment of multi-colored stems. Both equally as beautiful and delicious! We use the stems here as they get soft during cooking and add a nice heartiness to the dish.


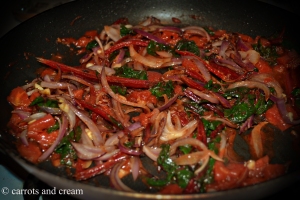
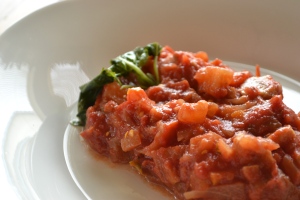
The combination of the sweet red onions, the soft tender swiss chard, and the tomatoes….mmmm…doesn’t get much better than this.


Wait…yes it does…..

INGREDIENTS

  • 2 cup(s) water
  • 1 teaspoon(s) kosher salt
  • 3 tablespoon(s) extra-virgin olive oil
  • 1 pound(s) extra-large shrimp, peeled, deveined, with shell tails intact
  • 1 medium red onion, halved, cut into thin strips
  • 2 teaspoon(s) minced garlic
  • 1 pound(s) rainbow-colored/red Swiss chard, stems cut into 2-inch strips, leaves torn into large pieces and rinsed
  • 1 can(s) (14 1/2-oz) fire-roasted tomatoes, undrained
  • 1 tube polenta
  • 1 tablespoon(s) unsalted butter
  • 1/4 cup(s) grated Parmesan cheese
  • Freshly ground pepper

DIRECTIONS

  1. Heat 2 Tbsp of the oil in a large, deep nonstick skillet over medium-high heat; add shrimp and red onion. Sauté 2 minutes; add garlic and continue to sauté 1 minute, just until shrimp turn opaque and onion is almost translucent. Remove mixture to a plate.
  2. Add remaining 1 Tbsp oil to skillet and sauté chard stems over medium heat 2 minutes. Top with wet chard leaves; cover skillet with lid and cook 1 minute until leaves are wilted. Uncover; continue to sauté 2 minutes. Add tomatoes with their juice and simmer 4 minutes.
  3. Meanwhile, cut your polenta into thick or thin (depending on your preference) and place in saute pan with butter. Brown polenta adding a sprinkle of parm on top at the very end. Let melt.
  4. Raise heat on chard mixture and add shrimp mixture. Cook 2 to 3 minutes longer, until shrimp are cooked through. Serve shrimp mixture on polenta; season with pepper to taste.

Meatless Monday: Acorn Squash Curry Soup

It has been squash city throughout the food blogger world recently. I thought I would jump on the band wagon but in a different way. See, I’m not a HUGE fan of the sweet dishes that combine veggies and squash together. I prefer more savory soups and stews (or stoups as Rachel Ray likes to coin them).

Staying close to my favorite flavors, I took elements from my favorite curry and decided to go with a coconut chicken broth base. Instead of using cinnamon, nutmeg, the typical spices when you think of squash, I used curry paste which has its own different realm of flavor. Slightly spicy, the heat gives you a little kick in the background due to the red chilies in this paste. I used light coconut milk which doesn’t have that same richness that regular full fat coconut milk does. But my solution to this was to use chicken broth which brings that stewed for hours flavor. Feel free to use veggie broth which I should have used given this is going up on Meatless Monday, but I just didn’t have any. Use what you have! I try to live by that motto.


This soup is creamy, decadent, and surprisingly low fat. Sure to warm you up on a nice cold Autumn day. Grab your favorite book, a nice blankie, and enjoy!

Ingredients:
1 TBPS EVOO (Extra Virgin Olive Oil)
2 carrots, roughly chopped
2 celeries, roughly chopped
1 clove garlic, roughly chopped
1/2 onion, roughly chopped
1 acorn squash
3/4 cup chicken/veggie broth (more depending on how you like your soup & how big your squash is, I added as I went along)
2/4 cup coconut milk lite
1 TBPS red curry paste
1 TBPS cilantro, chopped
Lite sour cream
Green onions for garnish
Garlic salt & salt to taste

(Measurements are from what I remember…I lost them last night when I made this, so these are from memory.)

1. Preheat oven to 375°. Half squash down the middle and remove seeds and pulp (melon baller comes in pretty handy). Place squash halves on greased cookie sheet and roast for 30 mins or until meat is tender. Remove and let rest 5 mins.

2. Meanwhile, saute your onions, carrots, and onions in evoo over low to medium heat in a sauce pan until tender and the onions are slightly caramelized (about 5 mins). Sprinkle a tiny bit of salt as this helps the onions “sweat” releasing their flavor and helps to soften the veggies. Add in garlic, saute 1 min more.

3. Once veggies are soft, add in your chicken/veggie broth, coconut milk, and red curry paste. Make sure to scrape the bottom of the pan to get all the brown bits up from sauteing the veggies. Here is where you can play with your measurements. If you like a thicker soup, keep to my measurements above. If you like more of a liquidy soup, add more broth. My philosophy is always to eyeball your measurements and adjust accordingly to your likes and tastes (don’t forget to taste along the way!) This goes for the curry paste as well. If you like spicy, add more curry paste!

4. Scrape the flesh from the squash into your pan with your broth mixture, add your garlic salt and salt to taste, and let simmer for 10 minutes.

5. Allow to cool or just go for it and put the mixture into a blender or use an immersion blender to blend all the ingredients together. Add the cilantro and stir to combine. Warm up.

6. Add to a nice pretty bowl, add a dollop of lite sour cream, and sprinkle with more cilantro or green onions.

**Recipe made by me, enjoy!

Help!

I jumped into this blog thinking that the pictures were going to be easy, the writing would just flow from keyboard to screen. Was I WRONG! I always thought that if I had an expensive camera, all would be right in the world. That I could just snap a picture and wham bam thank you ***. Beautiful picture.

I am feeling very disheartened with my photos and skills. I am a total novice photographer and am still trying to wrap my head around all this techno lingo like aperture, shutter speed, focal length. The list goes on and on. I even went so far as to purchase Plate to Pixel (not to mention looked at countless blogs, Youtube videos on set ups) in hopes that it would shed light into my brain, but I am even more confused than before. The point to this post is to ask you guys what you use. What are your tips and tricks? I have shot several times during the day, but I never get the right color in my photos especially according to Foodgawker. Do you have any special tricks with photoshop, or are your photos really that great with just natural lighting. Please HELP!

(Currently using Nikon D3100 w/AF-S Nikkor 18-55MM 1:3.5-5.6G)

♥ G

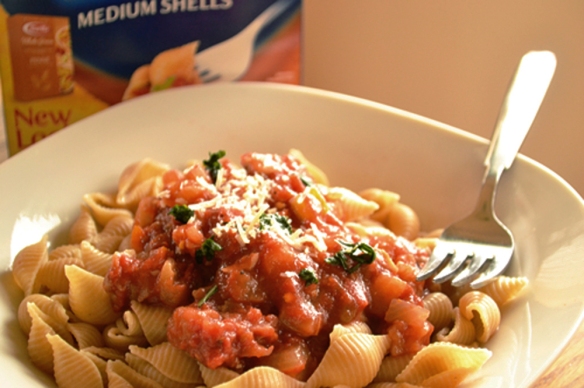
Whole Wheat Pasta with Eggplant-Tomato Sauce


It’s my second Meatless Monday dish, and I’ve been very excited to find new recipes that do not feature meat as the star. I almost think of this as a detox day to get in as much veggies and fruits as my body can muster.

This pasta sauce coincides nicely with both themes I am following this month, meatless (Mondays for sure only) and unprocessed (except for the pasta :/). The combination of the mushrooms, carrots, and eggplant really make this hearty so that if you are a die hard meat eater, you will not miss it in this dish.

After the fact, I added some raw sugar to the sauce as I felt like it was a little too sour. You could of course totally skip this if you want, but my taste buds haven’t quite gotten over the fake sweetness often added into dishes. What you are left with is a nicely balanced, FRESH sauce. You could even saute the veggies or maybe even roast them before putting them in the hot tub (aka slow cooker). If you do not like the veggies used, swap them out for something you love. And use whatever pasta you like. I just happened to have whole wheat shells on had. Use what you have! The possibilities are really endless…

Enjoy,

♥ G

Ingredients

  • 2 tablespoons unsalted butter, cut into small pieces
  • 1 small onion, finely chopped
  • 1 rib celery, finely chopped
  • 1 carrot, finely chopped
  • 1 clove garlic, minced
  • 1 medium eggplant, peeled, cut into 1/2-inch dice
  • 10 ounce mushrooms, chopped
  • Salt
  • 1 28-oz. can crushed tomatoes
  • 1 pound whole-wheat penne
  • 1/4 cup finely chopped fresh basil leaves

Preparation

  • 1. Mist a slow-cooker insert with cooking spray. Combine butter, onion, celery, carrot and garlic in slow cooker. Add eggplant, mushrooms and 1 tsp. salt. Stir in tomatoes, cover and cook on high for 4 hours or on low for 6 hours. Stir once or twice during cooking.
  • 2. Bring a large pot of salted water to a boil and cook penne until just tender, about 10 minutes. Drain pasta, toss with sauce, sprinkle with basil (and grated Parmesan, if desired) and serve.

ALL YOU
Issue 10, October 21st, 2011

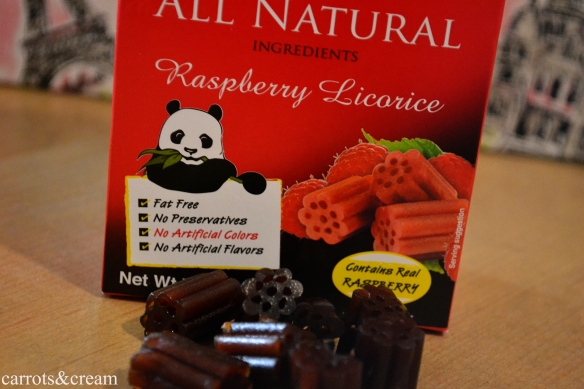
Review: Panda All Natural Licorice

These babies are from Finland. Who knew Finland had gourmet licorice….with a panda on the box! How awesome is that. My favorite animal was a panda bear when I was little – for no reason in particular mind you. I just liked them. So when I saw these in my grocer, I knew I had to pick them up…but only if they met the kitchen test. We came pretty close….Here’s the breakdown:

  • molasses (processed)
  • wheat flour
  • raspberry puree
  • citric acid (natural preservative most notably found in fruits like lemons, limes…)
  • natural raspberry flavor (suspicious)
  • black carrot juice (more like light maroon)
  • licorice extract

Panda real licorice features all natural ingredients, no added colors, salt, artificial flavors, or preservatives. Panda real licorice is fat free, Kosher certified, and suitable for vegan and vegetarian consumption. However, they are not gluten free – contains wheat flour.

And I know you are wondering – do they have other flavors other than raspberry? Why yes, yes they do! The flavors range from raspberry, cherry, regular black, and blueberry coming soon. Panda also makes other candies, but that may have to hold for another post. You can find this product in your organic/health section of most of your grocer’s ($3.50+).


Let’s see these are, um…what’s the word…NATURAL looking. No waxy, shiny coating here. There’s nothing but beautiful dark goodness inside these little nibbies. I must admit at first, I didn’t think they were that appetizing. I was expecting that same sugary, sweetness that often accompanies licorice. But the sugary sweetness is replaced by something a little more fresh. Like raspberry puree and carrot juice. I know, CARROT JUICE! This isn’t your regular orange carrot juice. They use juice from black carrots (black carrots appear more light maroon in color. This undoubtedly assisted these nibbies in creating their gorgeous deep color). In licorice….hrm. I wasn’t too sure about this combo either, but I thought what the heck. The sacrifices you make for the unprocessed journey right? I have been eating a few here and there everyday, and I am starting to like them more and more. Their flavor is sweet, slightly tart from the citric acid, and fresh because of raspberry puree. You do hint a small addition of the carrot juice but nothing overwhelming. This element is what really makes this item unique.

What is your favorite worldly, UNPROCESSED treat?

***G’s rating: B

*Disclaimer: I’m not popular enough for sponsored posts…just yet. You know what that means?! Me = $$$

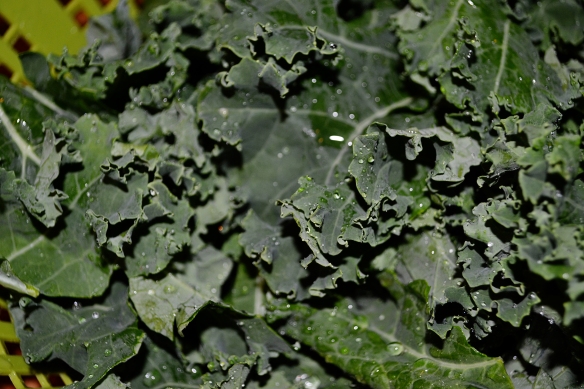
Meatless Monday: Baked Kale Chips w/ Parm

Aside

Welcome to Meatless Mondays! If you are not familiar with “Meatless Mondays“, it is an international campaign that encourages people to not eat meat on Mondays to improve their health and the health of the planet.


I thought I would kick off the series with a recipe I saw on Wishful Chef and that would be Baked Kale Chips with Parmesan. This is my 2nd, yes 2nd time making this because these can burn very easy and very fast.

These are definitely not for everyone. I would like to say this is a great way to sneak in some nutrition to your kidlets, but these Kale chips are definitely a grownup treat.

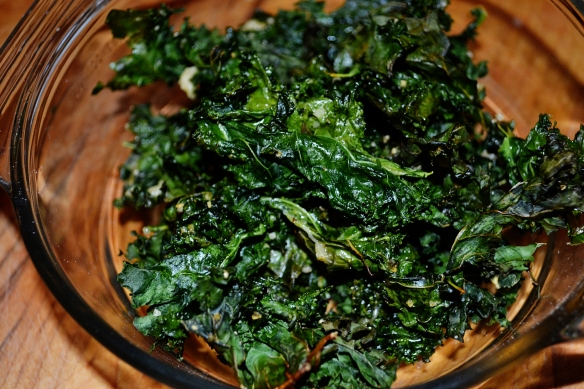
I prefer the Kale to be soft in the middle and slightly crunchy on the outside. When the chips come  out this way, they retrain a juicy salty center. It’s quite good if I do say so myself! These are in no means a replacement for potato chips, but it’s a great way to use leftovers and help take away your salt craving.

WARNING: You must like Kale ALOT to like this.

BAKED KALE CHIPS WITH PARMESAN

(adapted from Wishful Chef)

  • 1 bunch curly kale
  • 1 tbsp olive oil
  • 1-2 tbsp grated Parm
  • salt to taste

Preheat oven to 375°F.

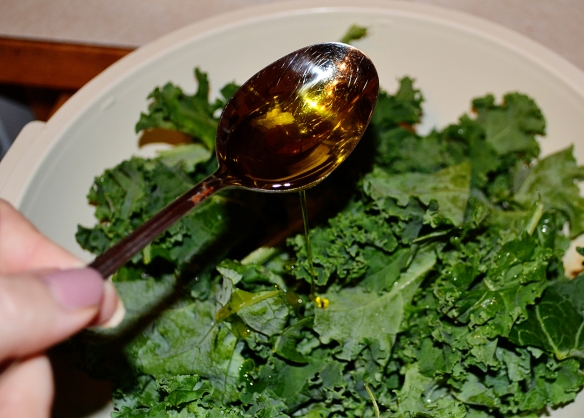
Cut leaves off the thick stems into large pieces. I just ripped the leaves off of the stem into smaller pieces and then rinsed the leaves under cold water. Dry well with a kitchen towel. In a large bowl, mix together the kale leaves, olive oil, salt and parmesan.

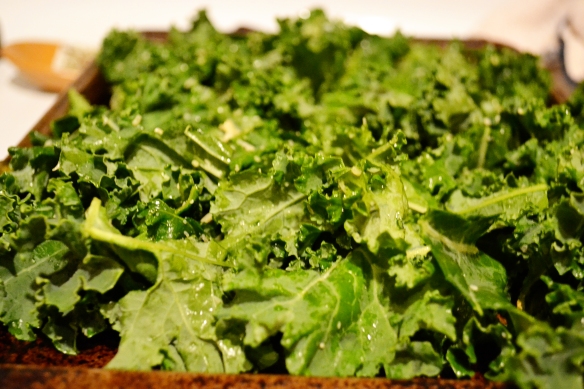
Spread leaves out on a cookie sheet. Bake for about 10-15 minutes total, checking it after about 8 minutes to make sure there is no burning occurring. At that point, turn leaves over so they bake more evenly.

Total time: 20-30 minutes
Yield: 4-6 serving